Sliding Silicon Stop
When rig building, a sliding stop using silicon rig tubing gives greater adjustability than fixed crimps. They’re easy enough to do and once you’ve got the hang of it, you can do them quite quickly. How many you need to use to get the desired level of resistance will depend on the line and tubing used. Make sure that the size of tubing is appropriate to the diameter of the line being used for the rig body. In the following illustrations, I used 6olb leader and 1mm tubing. Once I’ve bought my tubing, I spend a while cutting it all into sections and store them in a small container (saves doing it before a rig building session).
 Print This Page This will print the images as well as the text.
Take a length of your rig body line and slide on to it a small 4mm length of silicon rig tubing. Figs 1 and 2
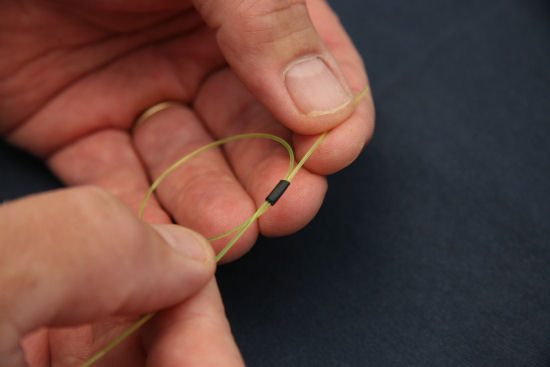
Now form a loop in the leader bringing the end of the line around on itself. Fig 3.
Insert the end of the line through the tube from the same direction as if going to do an overhand knot Fig 4. (but do not form a knot)
Draw the line either side of the tube tight, making the loop smaller. Fig 5.
..and finally pull until the loop disappears and you are left with what looks like a knot on the line Fig 6.
Pull at it and you’ll see that it slides freely. Fig. 7


